
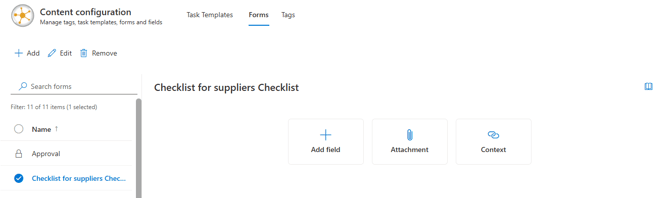
Form management Where to find it in ISOPlanner: https://portal.isoplanner.app/admin/content/forms
Here you can add, edit and remove Forms.
In addition to the standard Form, it is possible to create an "Approval" form as well. A form of the approval type is a ‘special’ form which can be used in the Approval module of documents, in the ISOPlanner library.
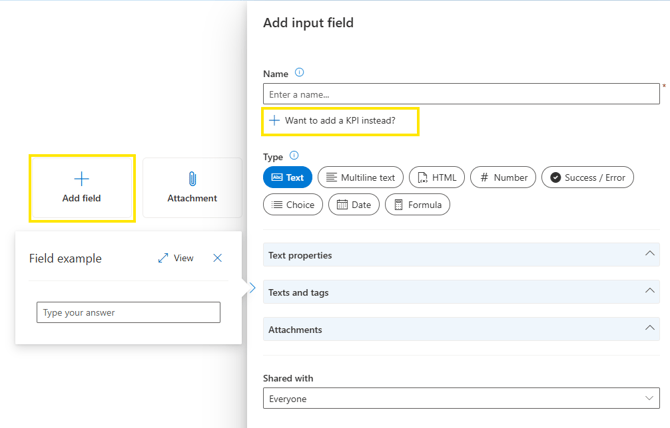
When creating a form, by clicking on the button add, different types of fields can be added:
- Field: after giving a fied a name , it is optional to create a KPI or continue creating a simple field. KPI is used for collecting data which can later be viewed in widgets and in the menu Organisation / KPI. Both for KPIs and a field a number of options is available such as Text, Number, Choice etc.
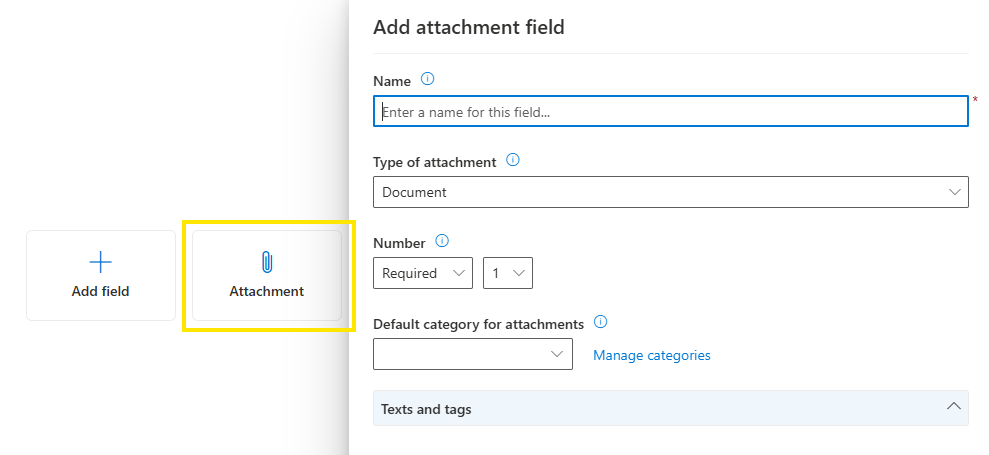
- Attachment. If evidence or supporting document needs to be added as a part of completion of the form, this type of field can be used. Within the settings, it is possible to determine in wich format the attached document needs to be (Type of attachment), it can be set as an option to upload the document and to make it easier, a document category, where the document will be saved, can be pre-determined.
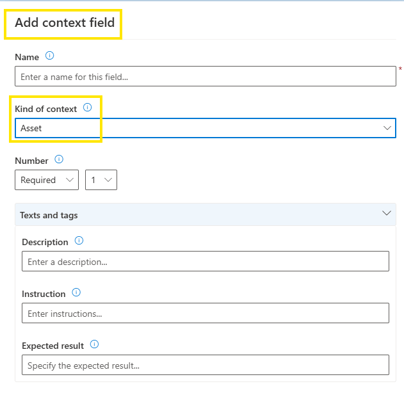
- Context. You can create a field for various context types like assets, processes and risks. This context will be added to all KPI data points on the form which is great for filtering later on.
Using a form
Once a form has been created with one or more of each of the above described fields, that form can be used in:
- An annual plan task. When creating a new task or adjusting the existing annual plan template, a Form can be added by clicking the Form button on the top. Clicking on that button shows all available Forms and one can be chosen and added to the template.
If a wrong form is added or it can be easily removed (or another one chosen). It is also possible to create a completely new form directly from the annual plan by choosing "add new form" option and it is not needed to go to the menu Forms. A form created directly in the template will also be saved in the menu Forms.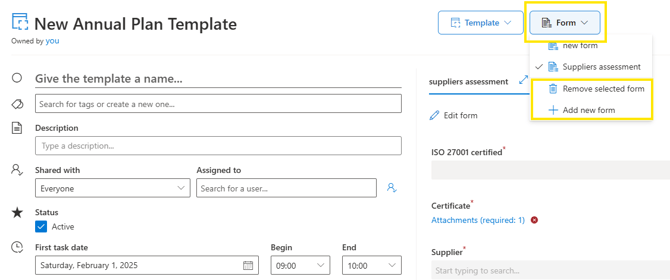
- Single task templates (task, event, approval). In the menu Administration / Content configuration / tab: Templates, templates for single task can be created or edited. Similar as in the annual plan, field "Form" is available within the template and a form can be added to the task template or a new form can be created directly within the template.
Forms can be used for all types of templates: approval, event and task.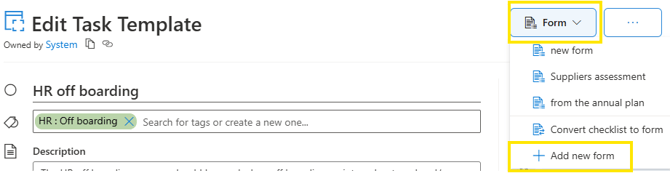
Every time a task which contains KPI is completed, data is being saved under KPI and it can be viewed in widgets on the dashboards.
For more information on KPIs and widgets, please check the articles:
how-to-work-with-kpis-and-forms


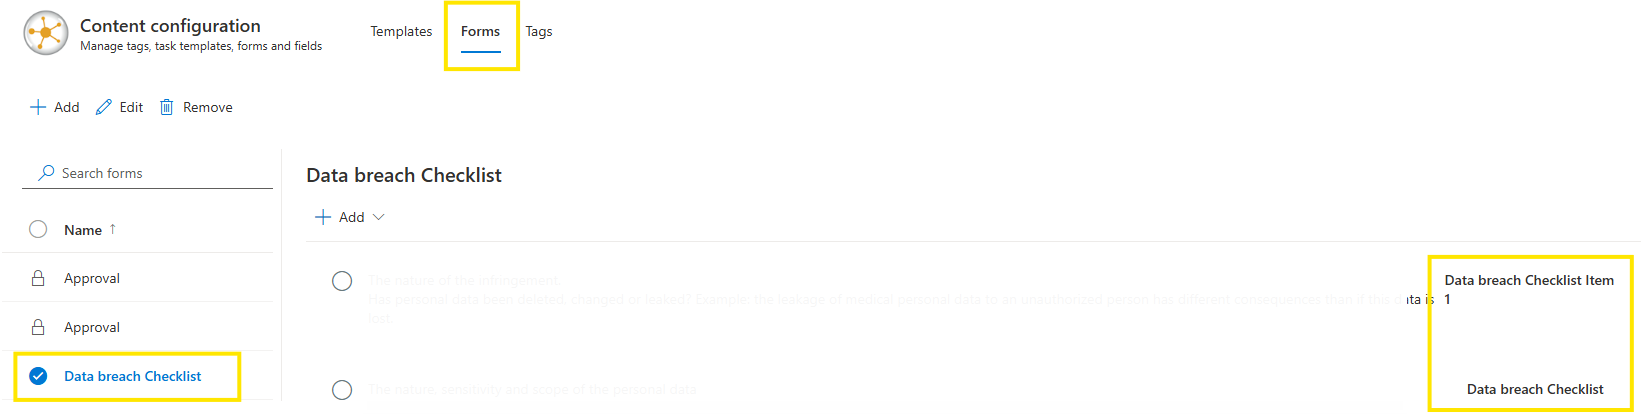
Creating a form based on a checklist
If there is an (annual)task template with a checklist but it is needed as a form, so it can be easily reused for other tasks, a checklist can be converted into a form. Within a template with a checklist, by clicking on the "Form" button, the option Convert checklist to form is available.
If this is a new annual task or an existing one and you made (other) changes, when you choose the option Convert checklist to form any changes made on the task will be automatically saved and a new form will be created based on the checklist. Before conversion is completed, information on the process is being provided and the conversion can still be cancelled
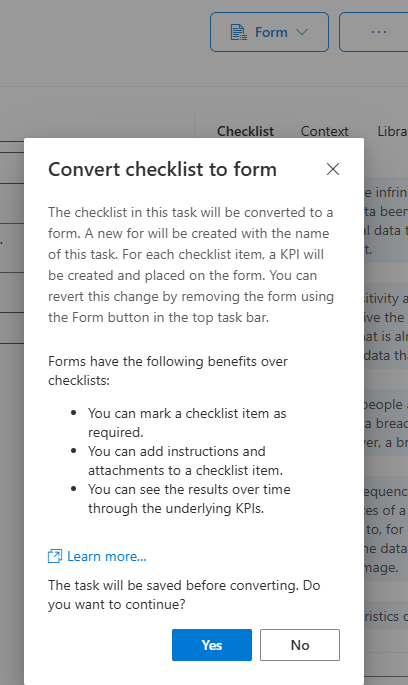
In the KPIs, each point of the checklist will be a single KPI
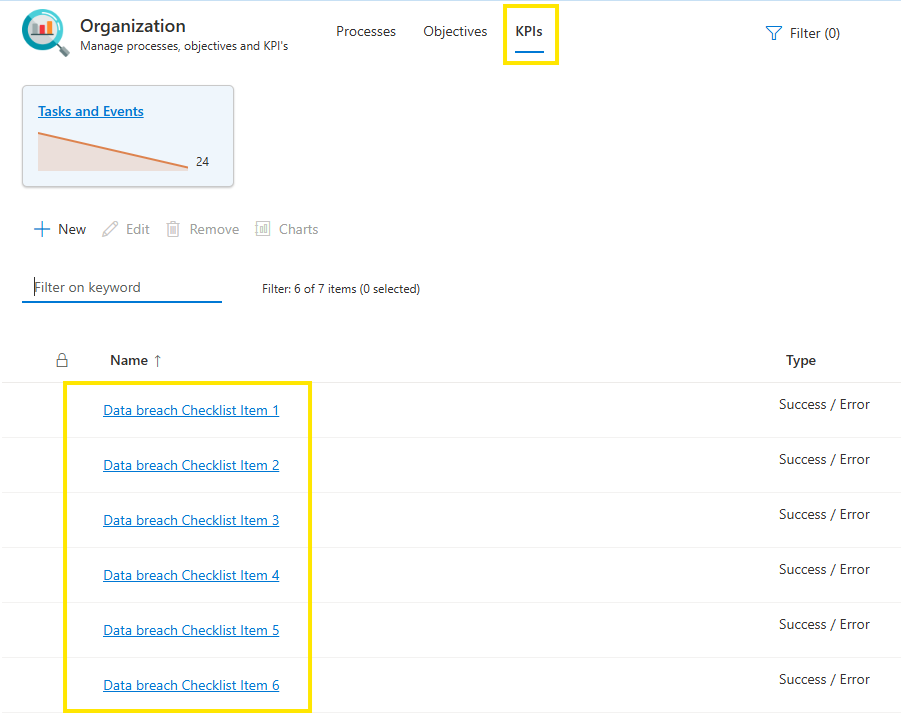
and in the menu Administration / Content configuration / tab: Form, new form is visible. Naming convention for the forms created from the checklists is the name of the task from which the form is created and “Checklist” added to that name.
Both KPIs and the Form created from the checklist can be changed.